
8 Ways to Sterilize Soil (Easy Steps You Can Do at Home)
Soil should be sterilized in order to eradicate harmful fungi and pests like fungus gnats, especially when used for indoor purposes. There are several techniques available that used over the years, from boiling to baking and the use of chemicals. However, it important is to get this right if you do not want to end up with a pile of unusable soil.
Baking, steaming, boiling, microwaving, grilling, and solarization are all good soil sterilization techniques. The soil must reach a temperature of at least 140ºF (60ºC) but never above 212ºF (100ºC). Hydrogen peroxide and formaldehyde can also be used for no-heat sterilization. These may last for a few minutes to several weeks.
Continue reading to find out how to properly sterilize your potting soil at home! The majority of the techniques to sterilize soil require bringing its temperature high enough to kill any harmful pests or weeds that might be present in the soil.
1. Baking
Baking your potting soil takes little setup and preparation, as it is very likely that you already have at home all items you need. This process requires half an hour. However, given that the soil will just sit in the oven, in the meantime, you can walk away to complete other tasks around the house.
What you might need to sterilize your soil by baking:
- Aluminum pan or any oven-safe container you have
- Foil
- Oven-safe thermometer
- Water
- Sprayer/Spritzer
Procedure to sterilize your soil by baking:
- Spread out the soil on a disposable pan or oven-safe surface that will not be used for food preparation. The depth of the soil should not be more than 4inches (10cm). Why? To guarantee a uniform heating process that will avoid the center to be too cold while the outer layers too hot. You also need to moisten the soil so that it is damp but not heavily saturated.
- Tightly cover the top of the pan/container with aluminum foil. Insert an oven-safe thermometer into the pan where it can be easily read while baking.
- Place the soil in the oven and set your oven to preheat to 180ºF (83ºC). Tip: If you know your oven well and you are aware that it will not reach the temperature, you can set a higher one (like 220ºF) and, after reducing the temperature.
- Monitor the temperature of the soil every 10 minutes. When reaching 180ºF, leave it inside the oven for another 1.5 hours to 2 hours (someone even leaves it even more, but it is usually not necessary). You can turn off the oven after an hour and half and leave it inside for another half hour.
You may need to adjust your oven temperature so that the soil remains around 180ºF but never above 212ºF (100ºC). If you have an extra oven-safe thermometer (or non-contact one like this good one on Amazon) even better. Indeed, you can place it in the other layer of the soil to check that the temperature is not overpassing 200ºF. - Remove the pan/container from the oven. Then, wait for the soil to cool down until it reaches room temperature before attempting to use it for plants.


2. Steaming
Steam sterilization is one of the most efficient methods. This is because it uses both steam and heat to kill fungi and bacteria within the soil, making it safe for indoor plants.
In this section, you will find how to sterilize your soil using a pressure cooker or, in case you do not like it (or you feel unsafe), a steamer pot.
2.1. Sterilizing Your Soil With a Pressure Cooker
In this process, the soil is placed inside a pressure cooker where heat and steam will penetrate and circulate through it.
What you may need to sterilize soil with pressure:
- Steamer pot or soup pot with a wire rack
- Pressure cooker
- Heat-safe, shallow container that fits inside the pressure cooker
- Water
Procedure to sterilize your soil with pressure:
- Add around 1 inch of water in the pressure cooker. Place inside the steamer pot or the rack.
- Fill the heat-safe container with soil and place it on top of the rack, or steamer pot, inside the pressure cooker. Then close the lid and open the steam valve. Again, the soil should create a layer no deeper than 4 inches to guarantee a uniform temperature. In case you have a rack with multiple levels, you can sterilize more soil samples at once (each one in a heat-safe container).
- Place your pressure cooker on the stovetop on high flame.
- Close the steam valve once the steam begins to escape and leave it for about 15 minutes. This is a sign that the water starts boiling, and the steam is produced. The heat and steam trapped inside the cooker will penetrate and sterilize the soil.
- Turn off your pressure cooker. Let it cool down before opening the valve, removing the cover, and using the soil.


2.2. Sterilizing Your Soil With a Steamer Pot
In this case, the soil is sterilized with steam, but without pressure. This approach will take around double the time compared to the pressure-based counterpart.
Procedure to sterilize your soil without pressure:
- Put 3 to 4 cups of water into a steamer pot. This is a cooking pot that has small holes on the bottom that sits within a larger pot. If you do not own a steamer pot, just place a wire cooling rack on the bottom of a standard pot so that the rack is above the water level.
- Place the soil you want to be sterilized into a heat-safe container. Make sure that the soil is not thicker than 4 inches. Moreover, do not pack or press it down. This is important as otherwise, the steam and heat will not be able to circulate freely through the soil, potentially leaving part of it not-sterilized.
- Put the heat-safe container into the steamer pot. Turn on the stove and leave it for 30 minutes.
- Turn off your stove and remove the soil from heat. It should be ready to use after 30 minutes it cools down. However, if it still feels warm, just wait a bit longer. Plants do not like warm/hot soil, as it can damage their roots.
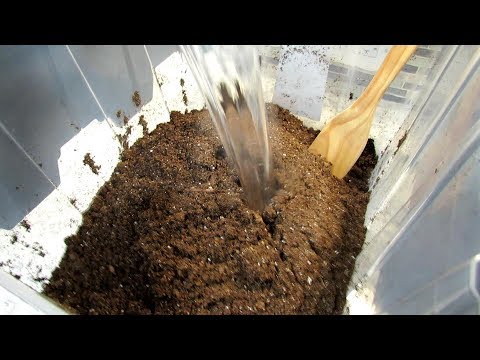
3. Microwaving
A pressure cooker and steamer pot might sound perhaps not very handy. However, the good news for you is that a microwave can be as good as the above. After all, it is one of the most common devices nowadays to warm up food.
You need to remember that in case the soil does not reach 180ºF (82ºC), you might need to split it into smaller batches. The size of such baches will depend on the maximum power and size of your microwave.
What you may need to sterilize your soil with a microwave:
- Microwave-safe plastic bag with zip-lock
- Water
Procedure to sterilize your soil with a microwave:
- Spread out the soil on a flat surface approximately ½ inch thick. This will help you moisten it uniformly. Why? You need to add water as microwaves work by moving around, at very high speed, water particles. This very juggling creates the friction that generates the heat you need to sterilize the soil. However, do not make the soil soggy.
- Fill the microwave-safe bag with soil. I would go for a maximum of 2 pounds (around 1kg) per bag. Why no more? Because this will cause the soil to be too hot on the surface (remember that the soil should never go above 210°F) while too cold inside.
- Microwave the soil for around 1 minute for one bag at full power. The time heavily depends on the power of your microwave and the type of soil (the 1min is referred to as 1000W microwave and high-quality potting soil).
- Repeat step 3 for a shorter period of time. Indeed, if the temperature is below 180°F (using a thermometer that you plant in the soil after microwaving) try a 2nd heating cycle of 10-20 seconds (depending on how cold is the soil) and recheck the temperature. Continue in this way until the temperature reaches 180ºF.
Do not close the bag during this stage. I prefer this approach rather than providing a specific time with just one heating cycle. Indeed, such timing strongly depends on the type of soil and microwave features that I cannot know a priori. - Close the bag. Then let the soil sit until it has cooled down to room temperature.


4. Boiling
As you might have noticed up to now sterilization is all about bringing your soil to a temperature high enough to get rid of unwanted guests in your soil. However, you might not want to use a microwave or oven to create the right conditions.
Hence, what about boiling water?
Boiling water has the advantage of never getting over 212ºF (the limit for soil, more on this later) and can be produced in many different ways (with a kettle, on a stovetop, etc…). This method, not very often known by gardeners, is also mentioned in a study conducted by the Kanagawa Institute of Agriculture Science, Japan.
What you may need to sterilize your soil with boiling water:
- A heat-safe container, possible insulating to host all your land
- Sealing for the container (no need to be hermetic)
- Boiling Water
How to sterilize soil using boiling water:
- Place the soil inside the container. Here you have to make sure to have enough space for the water. So, as a rule of thumb, the soil should not use more than ⅔ of the volume;
- Pour enough hot water to make the soil damp;
- Close the container and agitate it for a minute. This assures that the heat is trapped inside and uniformly distributed, so as to maximize the effectiveness of the sterilization. If the container is too large/heavy you can use a wooden spatula;
- Wait for 10-15 minutes and open the container.
- Let your soil dry. Do this by spreading evenly on a surface either under the sun or inside (if outside, make sure it does not get in contact with insects that might infest the soil).
The only trick to this approach is to keep the temperature high enough for a long period. Indeed, the capacity of the container to retain heat is essential. However, even if the water cools down in the process (it started at 212ºF), the soil will still be sterilized if the temperature does not drop below 180ºF.
Ideally, you would like to have a food thermometer planted in the soil (possibly with the sensor close to the central part, always the colder). A transparent container lid will allow you to see through.
This is the most straightforward technique of all. Ideally, you should use an insulated container that can keep the soil hot for a while.
If you do not have such a container, a simple plastic box (heat resistant though) would be ok although some microorganisms might survive the sterilization process.
Tip: Compress the soil once wet. You can do this with your hands with gloves as it will be hot or with a spatula. Indeed, this will allow trapping the heat/steam for longer as there will be less air (inside the soil) through which it can escape.

5. Grilling
Friends of mine who are quite sensitive to smells are put off by the earlier methods I mentioned. Mostly, it’s due to the idea of heating up soil inside their homes—a process that doesn’t really smell the best.
So if you share their sentiments, maybe using an outdoor grill to sterilize your soil is a better option for you! By using the grill in a more open area, with good airflow, the smell of cooking soil won’t be a big problem.
What you may need to sterilize soil by grilling:
- Baking pan
- Thick aluminum or tin foil
- Water
- Meat thermometer (here on Amazon)
- Grill
Procedure to sterilize your soil by grilling:
- Preheat your grill to 180ºF for 15–30 minutes. I recommend doing this first so that you can prepare everything else while waiting for this to get done.
- Prepare 2 sheets of foil that are larger than the baking pan. This is to avoid having the soil from spilling into the pan which you will only be using as a grilling container to make it easier to handle the soil.
- Use one of the foil sheets as a liner on the pan. This will act as the main container for the soil you will be sterilizing. Set aside the other sheet for later.
- Fill in the tin-foiled baking pan with soil. Make sure not to overfill it. Otherwise, you will have a hard time completely sealing up the soil into the foil later.
- Add some water into the soil-filled pan. The total amount will depend on the size of the pan you will using and how much soil you will be sterilizing. Then, mix this thoroughly. Just keep in mind that you want it moist, not saturated.
- Seal up the base foil layer with the other foil sheet. Make sure to tightly seal the edges of the two foil sheets together.
- Insert the meat thermometer into the middle. It should be able to reach into the middle of the moist soil inside but not go through the bottom foil sheet. This is to make sure that you can accurately keep tabs on the temperature of the soil inside.
- Let the soil encased in foil on the grill and cook it for 30 minutes. Keep your eyes on the temperature reading of the thermometer so you can lower or raise the heat of the grill when or if necessary.
6. Solarization
If you have a considerably large amount of garden soil that you need to sterilize, you may find the earlier methods too inconvenient as you would need to do several batches.
Hence, being able to sterilize multiple big patches of soil all at the same time would be perfect for you. This is even used by large-scale farmers because of its efficiency!
Solarization, as the name implies, is a soil sterilization method done by using energy naturally emitted by sunlight. But the problem with this method is that you will need to wait several weeks before solarization is complete.
What you may need to sterilize soil by solarization:
- Clear UV-stabilized polyethylene or polyvinyl chloride sheeting (0.5–4 mil)
- Water
Procedure to sterilize your soil by solarization:
- Clean out your soil of debris. You want to remove anything else other than soil. This includes remaining roots, twigs, leaves, rocks, and all that.
- Adequately water the soil. Again, there’s no exact mount for this. Just stop once the top layer of the soil is already noticeably wet.
- Cover the soil with a clear plastic film. Lay out the clear plastic sheeting on top of the patch(es) of soil you want to sterilize. This should be clear not colored—not even white—to allow sunlight to effectively penetrate the film and heat the soil.
- Secure the edge of the plastic sheet. Do this with some heavy stone or clean soil. Others even tuck the excess plastic into the ground to keep it in place.
- Let the soil bake in the sun for 4–6 weeks. Ideally, this should be done during summer, this will allow the soil encased in plastic to reach temperatures above 140°F (60°C). Then you can remove the film.
7. Use Hydrogen Peroxide
Sterilizing your soil using hydrogen peroxide is the only method on the list that does not require heat as it is based on a chemical process.
Indeed, hydrogen peroxide (sold in liquid form) has a higher amount of oxygen (one atom more per molecule if you have some basic chemistry, if not, just ignore this statement).
This extra oxygen has the tendency to react strongly with carbon (every life form has carbon in it) damaging it quite significantly. That is how this substance can be used to damage spores, bacteria, and any other microbial life lurking in your potting soil.
Moreover, as stated by an expert in the field, here the academic resource, “the free O atom can destroy dead organic material (i.e., leaves roots) that are rotting and spreading diseases.”
Hydrogen peroxide needs to be diluted in water (you will not even easily find 100% hydrogen peroxide). The majority of typical retailers, just have a quick look here to check Amazon, drug stores, and even pharmacies, sell this substance in 3 to 35% concentration.
What you may need to sterilize your soil with Hydrogen Peroxide:
- Hydrogen peroxide (3% or 35%)
- Large pan or flat surface
- Water (tap is fine)
- Measuring cups and spoons
- Bucket or glass bowl
- Sprayer/Spritzer
How to sterilize soil using hydrogen peroxide:
- Create the solution of water and hydrogen peroxide. You should use 1 part of 3% hydrogen peroxide for each part of the water. In case you are using 35% hydrogen peroxide, then 10 parts of water for each hydrogen. However, you can stick with the 3% version as a way safer to handle.
A note of extra care by wearing gloves and goggles if available. Indeed, hydrogen peroxide, at high concentration, is corrosive and might also cause a strong reaction (production of a high amount of gas) if in contact with organic matter. It can also be an issue if it gets into your eyes or skin. - Spread the potting soil out on a flat surface creating 0.4 inches (1 cm) thick layer. You may do more soil by stacking more 0.4 inches layers and watering each time. You can use a baking paper sheet. As extra precautions avoid metal as hydrogen peroxide reacts with it (although very limited given the low concentration we are using).
- Spray the soil until damp, not soaked. Make sure to spray all your soil uniformly without forgetting corners.
- Let sit until dry or almost dry. Then mix so that new soil is on top. Repeat steps 2 & 3 until you are sure that all soil has been sprayed. This usually might take 3-4 iterations.
- Allow the soil to dry completely. Do this outside, under the sun, before use. Wait for at least 3-4 hours, even if dry before using it for planting purposes. Indeed, this solution takes a long time (2-3 hours) to kill spores. However, all other lifeforms around 50 minutes are in general enough, as detailed by The Department of Health of Louisiana.


8. Use Formaldehyde
Last but not the least, you could use a diluted formaldehyde solution to effectively sterilize your soil. This chemical is widely used as a fumigant, disinfectant, and soil drench (sterilization). Plus, it’s non-corrosive for a variety of materials, including
But this should be your last resort!
Why? Because formalin or formaldehyde can be highly irritating unless it is properly diluted. Even then, it’s advised to wear protective gear while handling this substance. This can also be toxic for our furry and scaly pets so it’s best to keep them away while you’re doing this.
What you may need to sterilize soil using formaldehyde:
- Mask
- Nitrile gloves
- Safety glasses
- Bucket with lid
- 37–40% formaldehyde
- Water
- Long wooden stick
Procedure to sterilize your soil using formaldehyde:
- Loosen the soil. Before proceeding to the next steps, work your hands through the soil to loosen it up and get rid of unwanted debris still left in it.
- Dilute 37% or 40% formaldehyde in water at 1:50. At this point, your sterilizing solution will only be concentrated by 2%. But it’s still best to be cautious and wear a safety mask, gloves, and glasses while adding the solution into your bucket of water.
- Add the soil into the bucket with the formalin. Don’t just dump it all in at once. It’s better to slowly add it in to lessen splashes. Stir it around with the stick to ensure everything is fully immersed in formalin.
- Secure the lid of the bucket and let it sit for at least 24 hours. This step is essential for the soil to be properly sterilized in the solution. Otherwise, you will have the fumes leaking out.
- Drain, rinse, and then let the soil dry. Make sure to thoroughly rinse through the formalin-drenched soil before using it again. Keep rinsing it again and again until you can no longer smell the formaldehyde solution in the soil.
Why Should You Sterilize Potting Soil?
Both garden and potting soil should be sterilized to kill harmful bacteria, fungi, and pests both in adult and larvae form. Sterilization is particularly important when outdoor soil is used for indoor plants where the presence of insects can be also a nuisance.
Just have a quick look at the comments on retailer websites regarding potting mix. If you do not have the time here is a quick summary of the most common insects that gardeners have found in just opened potting mix.
- Fly eggs: this appeared in the potting mix as a tiny white pearl. These are entirely invisible to a quick naked eye examination making it extremely hard for the gardener to identify them in time;
- Tiny black bugs: although the gardener did not specify these might be thrips or aphids. Both of them very dangerous to plants
- Gnats and centipede: a gardener even found a “zoo” himself defined by insects including gnats and centipedes with other hard-to-identify insects.
Hence, if you want to avoid such conditions, sterilization is a must. This is even more important for seedlings, as they are even more susceptible to these conditions. Plant them in infested soil, and the chance for them to succeed and give you fresh plants goes almost to zero.
Ideal Temperature to Sterilize Soil
The ideal sterilization temperature is between 180-210ºF. During sterilization, the soil should never reach a temperature above 212ºF (100ºC) as this will trigger the release of minerals like manganese, typically locked in the soil. If this happens, plants might suffer from manganese poisoning.
I suggest going at 180ºF for 30 minutes, as safer for dangerous chemicals. This will be suitable for most of the soil.
Moreover, remember that the soil should be as uniform as possible and free from any non-soil particle (plastic, metal) that you might need to remove manually before proceeding.
Not all sterilization methods are quick or easy. Indeed, you cannot merely place the soil in the oven for a random amount of time and temperature.
As clearly stated in this authoritative gardening study, 180ºF is the temperature above which you can guarantee to kill all harmful organisms in the soil, as shown in the table below. However, remember, that the sterilization process should never bring your soil to a temperature above 212ºF (100ºC) for reasons that we will discuss later.
Now let’s dive into the best sterilization techniques for potting soil.
| Harmful Organism | Max Tolerable Temperature |
| Disease-causing fungi | 140ºF for 30 minutes |
| Bacteria, most plant viruses, and soil insects | 160°F for 30 minutes |
| Weed seeds | 180°F for 30 minutes |
Should You Sterilize Outdoor Gardening Soil?
Outdoor gardening soil must be sterilized before being used indoors. However, outdoor gardening soil should not be used for potted plants as indoor plants often require an airy and fluffy medium with high drainage, often missing in outdoor gardening soil.
However, if you want to go ahead with garden soil, the answer is yes, you must sterilize it. Indeed, in the case of potting mix (in theory) sterilization should not be necessary, this is a must for garden soil. Garden soil is thriving with a large variety of life forms.
Some of them, however, can be pretty harmful to small starting plants. So the best decision is to sterilize your garden soil before using it as potting soil.
However, just to restate what I said before if you can avoid garden soil for indoor plants. Indeed, garden soil might lack the physical drainage features of the right potting mix. You can either create such a mix inexpensively yourself if you like to DIY as discussed here or buy a good quality one, as discussed in this article.
Common Mistake: Forgetting to Sterilize Your Tools
You have followed all the instructions carefully, and you had sterilized your soil. However, you might have forgotten that all the tools and containers that come in contact with your original soil carry the same identical bacteria and fungi.
Hence, if you touch your sterilized soil with one of them, your efforts are vain, as such lifeforms will tend to repopulate your soil quickly. You need to sterilize them.
Hence, how do you sterilize your tools?
To sterilize my gardening tools, I use a simple 4-step approach:
- Just wash them under normal water to remove any visible soil traces.
- Place in a bucket a solution of bleach and water (9 liters of water for each liter of bleach);
- Place the gardening tools, plant container included, in the solution totally submerged for around half an hour.
- Take them out and let them dry at the open air
In performing such an operation, remember to wear protective plastic gloves. Indeed, bleach is a corrosive substance and possibly a mask to avoid inhalation of the gases produced.
Pasteurization as Sterilization Alternative?
Sterilization is a “brute force” approach as the very high temperatures target all living forms in the soil. No organisms/life form remains.
This is not always a piece of good news as soil hosts also lifeforms beneficial for your plants. For instance, a few “good” allies might prevent nasty fungi from spreading by competing with them. Others might break down organic matter producing nutrients for your plants, carbon, oxygen, and even natural pesticides.
However, if all organisms are removed through sterilization, there is no competition left in the soil. So the first living organisms that will land on your soil after sterilization might easily take over the whole soil. You can guess what would happen to your plants if such organisms are fungi or harmful bacteria! This is the main drawback of sterilization.
Pasteurization can be an answer to this problem. This technique simply heats the soil (following the same approaches described above, excluding the hydrogen peroxide one) but at a lower temperature of around 145°F (63°C), as discussed in this article from the University of Natan.
Further Questions
Are all potting mix soil in the market sterilized? No, some potting mix they are sold as “natural products” so they do not undergo any sterilization process.
Can you sterilize the soil in a greenhouse? There is a large variety of techniques also discussed here. The cheapest is the use of heat resistant plastic sheet that, once properly fixed to cover the soil, allows to trap heat (injected beneath the layer). This will “steam” the soil. Although it requires several hours and has a limit of depths of soil sterilized, it is very cheap and covers a large portion of the ground at once (depending on the size of the sheets).

![Why Does Soil Sink In Potted Plants? Is it a Problem? [Hint: yes]](data:image/svg+xml;base64,PHN2ZyB4bWxucz0iaHR0cDovL3d3dy53My5vcmcvMjAwMC9zdmciIHZpZXdCb3g9IjAgMCAxMjAwIDk2MCIgd2lkdGg9IjEyMDAiIGhlaWdodD0iOTYwIiBkYXRhLXU9Imh0dHBzJTNBJTJGJTJGd3d3LnlvdXJpbmRvb3JoZXJicy5jb20lMkZ3cC1jb250ZW50JTJGdXBsb2FkcyUyRjIwMjElMkYwNyUyRkcxMjUuanBnIiBkYXRhLXc9IjEyMDAiIGRhdGEtaD0iOTYwIiBkYXRhLWJpcD0iIj48L3N2Zz4=)


